Showing posts with label DIY. Show all posts

Monday, December 15, 2014

Easy DIY: Ring Boxes 1

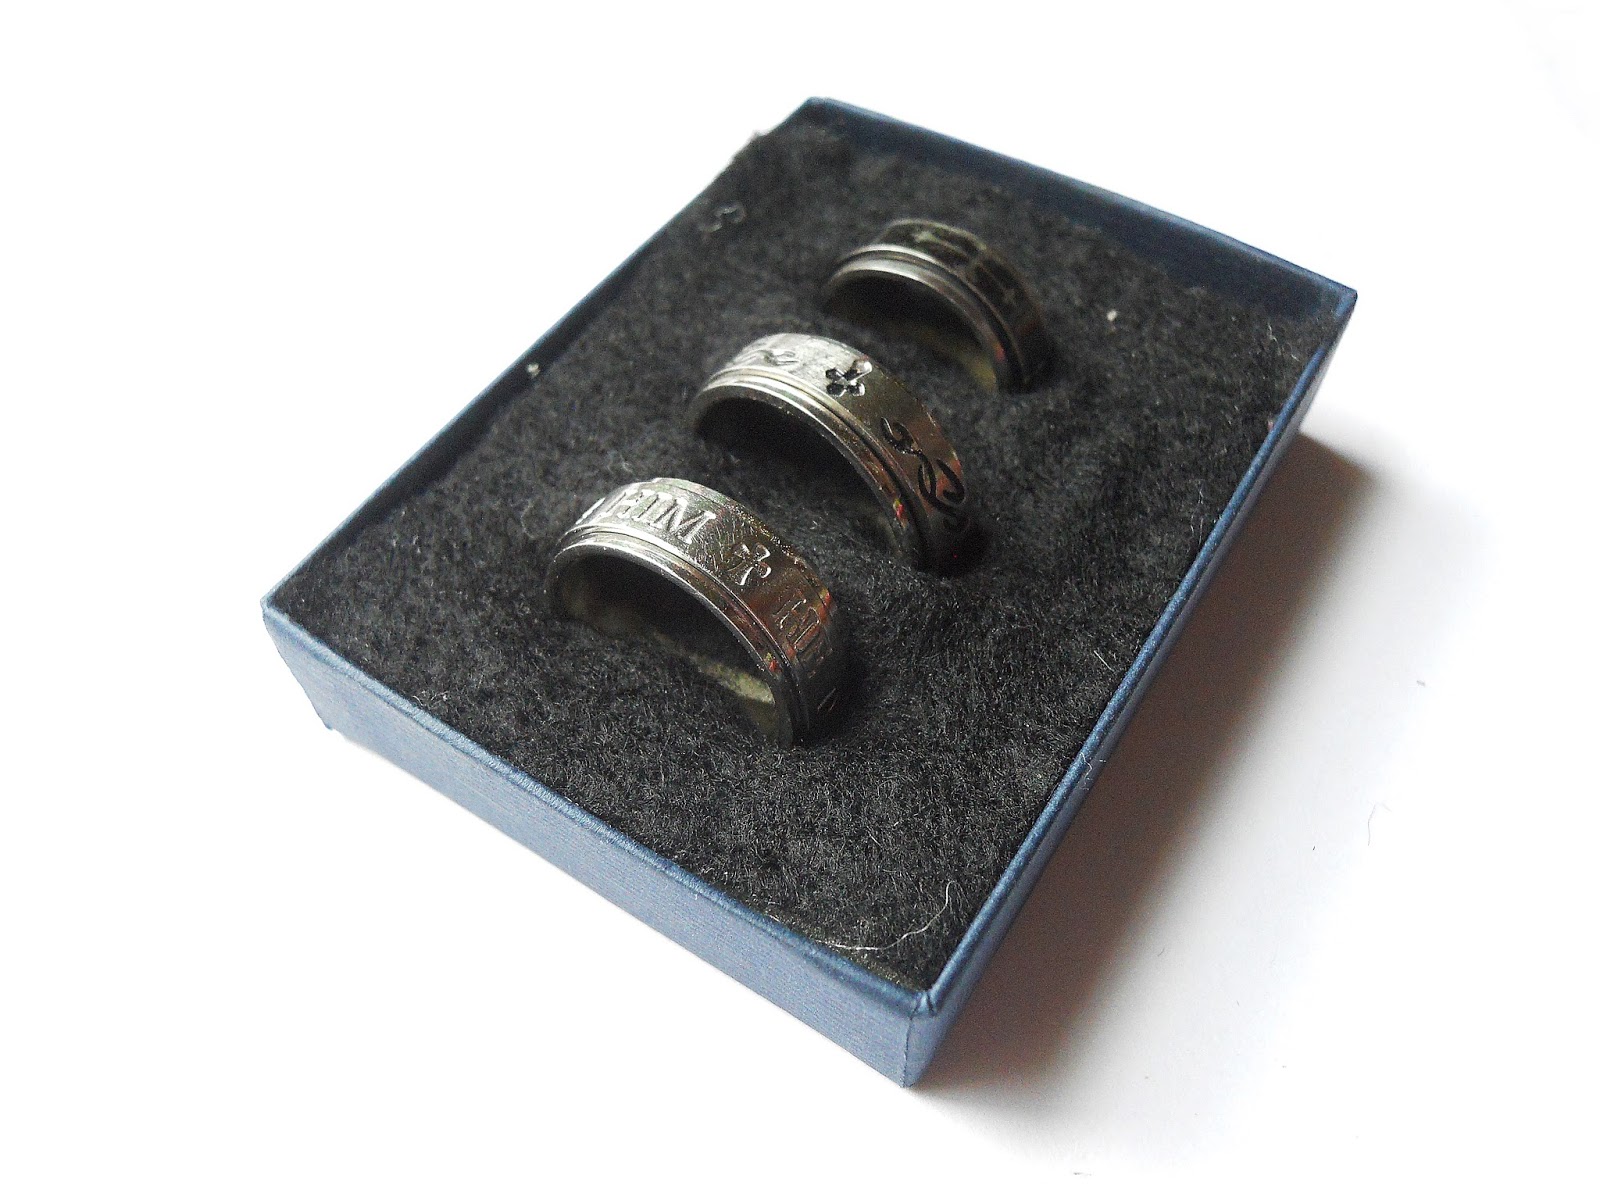
Why would we want to know how to make ring boxes? Because why not. Here's Ring Box #1. I'll show you how to make Ring Box #2 next week.


Here's what you'll need:

Note: Up top are all the materials. I'm only going to list the materials for Ring Box #1.
-Hot glue gun
-Exacto-knife
-A piece of sponge
-Black felt (or velvet)
-A little box

Let's make a ring box:

1. First measure out your box and then cut a matching piece of sponge. Make sure it fits in the box.

2. Now cut a matching piece of felt! You may want scissors for this. Exacto-blades don't like felt. Sponge, but not felt.

3. Glue your felt n' sponge together so it looks like one of those cheap desserts you get at a buffet. 

4. Now cut that sponge. I put three slits in mine since it wasn't a big piece of sponge.

5. After all that gluing and cutting, you can stuff your sponge cake right into the box. You can go ahead and glue it in there but friction does well in holding it in place; just in case you need the box again.

6. Ta-dah. You have a little ring box.

More notes/tips:

Keep in mind here, you can make yours as fabulous as you want. You can put washi tape on your box. You can use a different kind of felt (I originally wanted orange felt but I couldn't find it). The possibilities are endless with a DIY as simple as this.

Monday, December 8, 2014

It Was Supposed to Be a DIY...

But it was just a mess and I'll show it to you anyway.

So I have this cruddy little clip board I never use.
It's not like it's that bad. I mean, I loved the fact that it has measurements on its sides but I have enough rulers to measure out a mile.
So I decided to paint it. I was feeling a kind of striped patterned thing.
So I started with a baby-blue base and spray painted the front.
Then the back.
 And I was all ready to make some nice purple stripes.
And I start spray painting...
 And it's going all nice n' stuff. AND THEN I FREAKN' RUN OUT OF PURPLE SPRAY PAINT. I'm like "what? Really? FREAKING, REALLY?" So I crack out the acrylic paint and I don't have a single purple that even remotely looks like the one I was spray painting with. So I think to myself "okay, just relax, chill out, I can mix paints, I can do this."
The end product was a purple that didn't completely match the original but is totally undetectable by anyone's eyes but my own. It may bug me but at least no one else will know.
So the back (the spray painted side) came out fabulous. It's not the smoothest, but it's still nice.
 The front, however—the side in which I may write on—was a lumpy-surface-area disaster. The acrylic paint was pulling on the tape and made a couple of scraggly sides and of course I didn't think about what the millions of coats of acrylic paint I applied to get the purple hue right would do to the all over look and feel.
So I said "Nuggets. Just forget it." and I then applied a nice coat of this stuff. Which is for paper but I used it on something totally different anyway. Happy Monday guys.

Monday, August 11, 2014

Easy DIY: The Overly Moisturizing Foot Cream

You have Crisco. Or some form of shortening. You probably do. Did you know you can wipe that stuff on your feet for a super moisturizing cream? But of course you want to make it pretty and stuff! Let's make a Spiced Moisturizing Foot Cream.


Here's what you'll need:

-Some Shortening or Crisco (1/4 cup). I've used both and they're pretty much the same.
-Some powdered cinnamon and nutmeg (2:1 of preferred spice).
-A teaspoon of shea butter.
-(Optional) Two Vitamin E gel capsules.

Let's make a moisturizer:

  1. Start off by mixing your Crisco and shea butter together to get it smooth. You can do this by hand or you can put it in the blender to kind of whip it.
  2. Next add a couple of shakes of cinnamon and nutmeg. Your number of shakes should be a 2:1 ratio of your desired spice. If you want more cinnamon, then add twice as much cinnamon than nutmeg and vice versa if you want more nutmeg.
  3. You can stop here and put it into a container (a nice little jar for a stupid cute look) or you can get your vitaE gels and pour a couple of them into the mix. I like to add a ton of them but I'd be careful with this mix since it's already heavily oily (it's got a feel like a smooth coco butter).


More Notes/Tips:

Now all that's left to do is to slather some on your feet before bed, put some socks on, and sleep away. Or if you have insanely dry or ashy skin, this could work for you. It's a bit slippery but it does its job incredibly well.

Tuesday, May 20, 2014

Essential Oils?/Easy DIY: Simple Olive Oil Scrub


As of now, the big hype in the world of Organic is the essential oils. Almost all the really cool organic beauty projects that you can DIY all require essential oils. Now, if you're a lazy bum like I started before I got into this business, I wanted the best, the cheapest, and the easiest.

To sum things up: I feel ya'.

I'm going to start bringing to the blog non-essential oil recipes for the quick and easy DIYers that really just want to open the pantry and BOOM; Instant beauty product. To start things off, let's do a simple scrub! This was actually the first scrub that I ever made.

D'aww. Look at my cruddy camera phone!

This only calls for two ingredients and a container: Olive oil and brown sugar.
(Oh no! So many words! TL;DR! Don't worry, if you're that lazy, just stop at bullet two).
  • Usually, people call for a 2:1 ratio of mineral to oil. I honestly prefer a 3:1 ration or more (like 4:1) because the oil will start to pool on top and then becomes too oily for me. But the ratio is up to you. (My ratio is in cups).
  • Grab a good mixing bowl, dump everything in and get mixing.
***
  • Another great addition is vitamin E oil. If you have a bottle of some, great. If not, search your vitamins and see if you have the vitamin E oil capsules. I know that opening a pill is like taboo, but don't hesitate to stick a pin in it and squeeze out the oil into your mix. Ta-dah; you just took this scrub to the next level.
  • You could stop here and just put it into a container and go. If you want to be more creative then let's keep going. Don't be afraid to get funky with your ingredients. Crushed herbs (just pry open a tea bag) can add total awesomeness to your already-amazing scrub.
  • Have fun with your scrub. If you have anything else you want to add to it (that's safe of course) go for it. To wrap things up, it's time for the container. Instead of putting it into a boring Tupperware container, find a nice little jar to stuff it all into. Jars add a great touch. You can even make it pretty with a little ribbon around it. Now set that baby on your shelf and you have yourself a beauty product.
I probably should have cleaned that up a bit...

Here's another easy tip: the brown sugar can easily be replaced with some other sugar or salt (a large salt like sea salt or kosher salt) and the oil can as well. Scrubs don't have definite ingredients and can usually be made with any natural oil (no vegetable or canola oil) and salt or sugar.

Salt or Sugar?

This depends if you want it as a face scrub or body scrub. Sugars don't dissolve as fast and are therefore better for a body scrub. They can be a little rough on the face. If you do wan't a sugar for the face, I'd use plain white sugar.
If you're looking for something soft on the body and therefore gentle on the face, then the best would be a salt. I'd recommend using large crystal salts. Now because salt is salt, 'careful around wounds or your eyes if you chose to use it on your face. 

Monday, February 17, 2014

Mod Podge Shelf Make Over

So, my first DIY. Now here's the deal. I have a beautiful antique vanity that HAD gorgeous woodwork. Unfortunately that is gone and it's a bit beaten up. So I wanted to spruce it up what little I had. I had no paint but a vast knowledge of the million-and-one things you can do with mod podge.


Oh, how purple! Anyway, the finished product was a pretty shiny paint look. Without the paint.


Oh, how bright! So if it's not paint, what is it? Paper! Wonderful card-stock paper! Originally this was to be done with patterned paper like a chevron print. Unfortunately I didn't have that on me so I just plastered on some purple to see how it'd work/look.


Here's all the things you should need:
Mod Podge
a sponge brush
a screwdriver
an exacto-knife
your choice of card-stock paper
invisible squeegee...


1. First, of course, empty all your stuff out into a clean place. In my case, the floor. Next, unscrew the handle of the drawer and set aside in a safe place. In my case, also the floor.


2. Go ahead and wipe down the front of the drawer. After that, drizzle on some Mod Podge to the face of it. MAKE SURE TO GET THE EDGES VERY WELL! If you don't, your edges could get scruffy and unattractive looking. Next, take the sponge brush and start spreading it around the face in one direction.


 3. After that spread the sheet of paper onto the face of the drawer. I didn't at the time, but I would recommend grabbing a squeegee and flattening the paper out to reduce air bubbles. Let dry for 15 minutes.


4. Drizzle the Mod Podge onto the brush (not the face of the drawer) and begin to stroke it onto the paper. Already bubbles are forming but we'll take care of that later.


5. And by later I mean now. While it's still wet, press the bubbles down with your fingers and hold them there for a moment. After you lift, your fingers may leave a print. That's ok, just add a little more Mod Podge and stroke right over it. Let dry for 10 minutes.


6. Time to cut. Make sure you are on a PERFECTLY level surface before you cut. Take your exacto-knife and begin to cut as close as you can to the edges. If you want to make sure you get as clean as possible (no paper hanging off) try cutting on the face of the drawer but still close to the edges. After cutting, take a little more Mod Podge and take it around the edges to seal the cut sides.


7. If you haven't done so, go ahead and poke holes with scissors where the handle holes are. After that, begin to put all your stuff back on. Make sure the screws are in tight!


8. Load all your stuff back in...(Look at my beautiful, mismatched socks!)


 9. Put the drawer back in and there you go! Lovely colorful drawers!


And this is what would happen if you didn't A) Get the edges with the Mod Podge in step one. B) Did not cut on a perfectly straight surface. C) Didn't seal the edges in step 6. It's a bad picture, but you get the idea.